

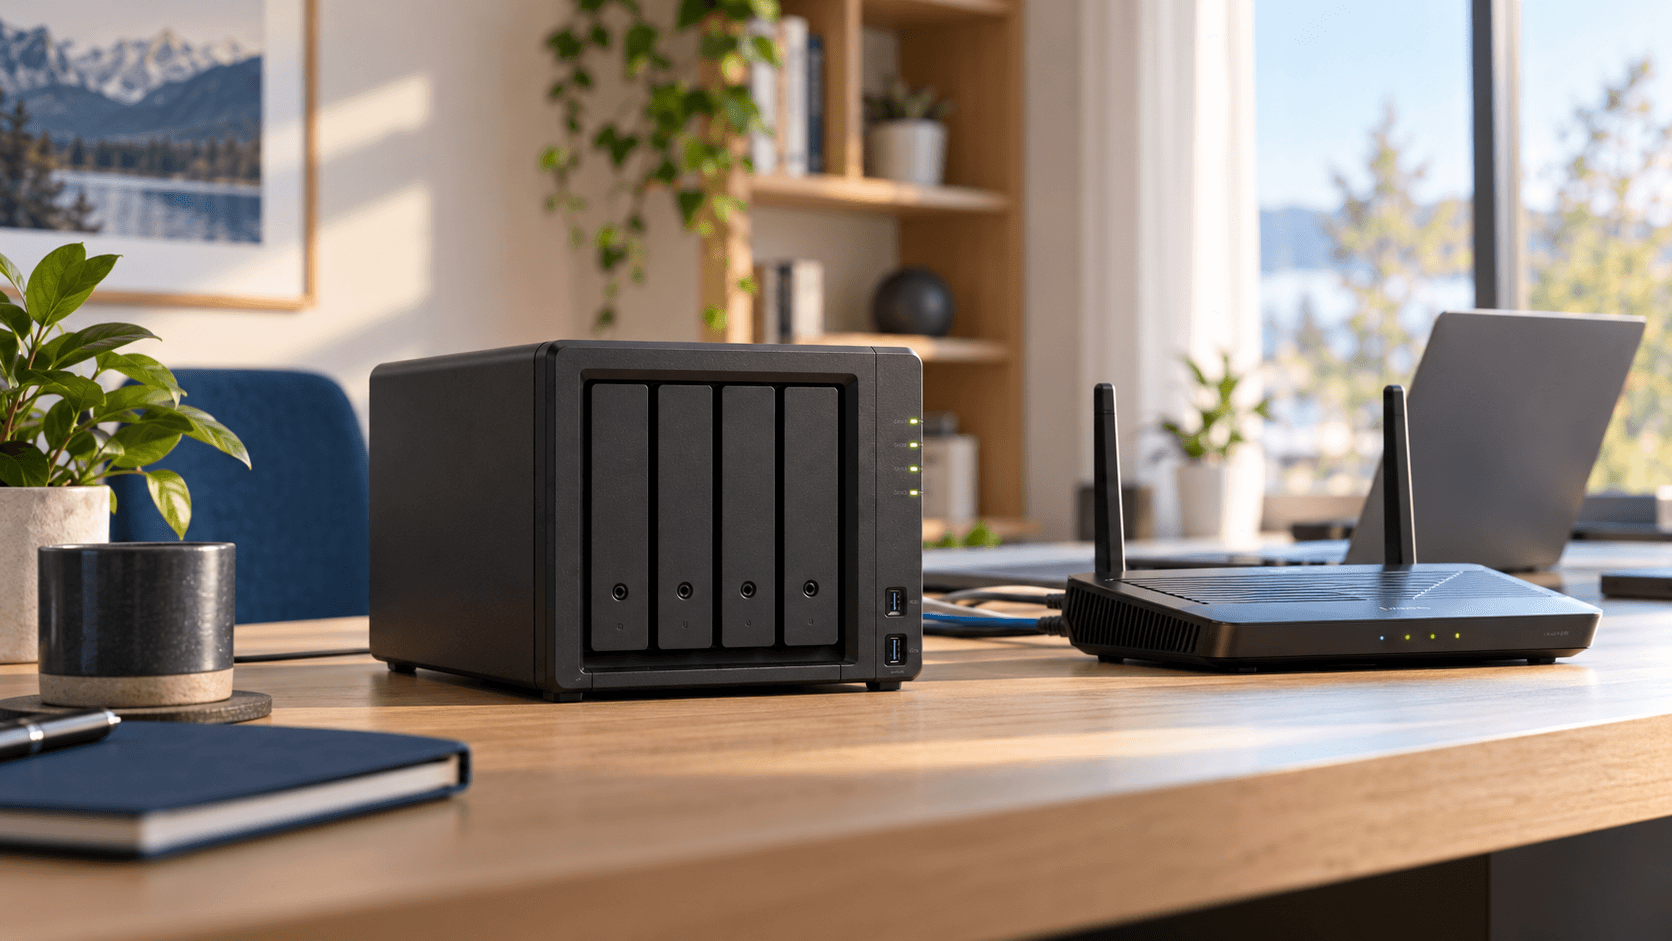
The best home network for a Synology NAS depends on one question: what do you care about most? Faster speed for one computer, smooth access for many people at once, or keeping your files safe from other devices in the house. Each goal points to a different setup.
The Four Common Setups
Flat network. You plug the NAS into your normal home router or an unmanaged switch. It sits on the same network as everything else. Simple, but there is no separation. If a cheap smart plug gets hacked, it can reach your NAS.
Link Aggregation (LACP). You bond two or more NAS network ports together into one link, connected to a managed switch. This can increase aggregate bandwidth across multiple flows and tolerate an individual cable failure. LACP alone does not make a single file transfer faster; storage and other network links can still be bottlenecks.
Direct-attached hybrid. You connect one normal 1GbE port to the router for internet and updates, and a separate 10GbE port straight to one workstation for heavy work like 4K video editing. You get very high speed to that one machine without buying a 10GbE switch.
VLAN segregation with an encrypted mesh VPN. You put the NAS on a private, trusted network (a VLAN) that is walled off from untrusted gadgets like smart TVs and IoT devices. For remote access you use a mesh VPN like Tailscale instead of opening ports on your router.
Quick Comparison
| Setup | Best for | Main benefit | Main drawback |
|---|---|---|---|
| Flat network | General home use | Plug and play; no special gear | No isolation; one hacked device can reach the NAS |
| Link Aggregation | Households with many users | More aggregate bandwidth; individual link failover | Needs an 802.3ad managed switch; no faster single transfer |
| Direct-attached | Video editors and creators | Huge speed with no 10GbE switch cost | You must set a static IP on the direct link by hand |
| VLAN + mesh VPN | Prosumers and home labs | Isolation with controlled remote access | Needs capable hardware and more networking knowledge |
The Setup I Recommend: Split the Network, Then Tunnel In
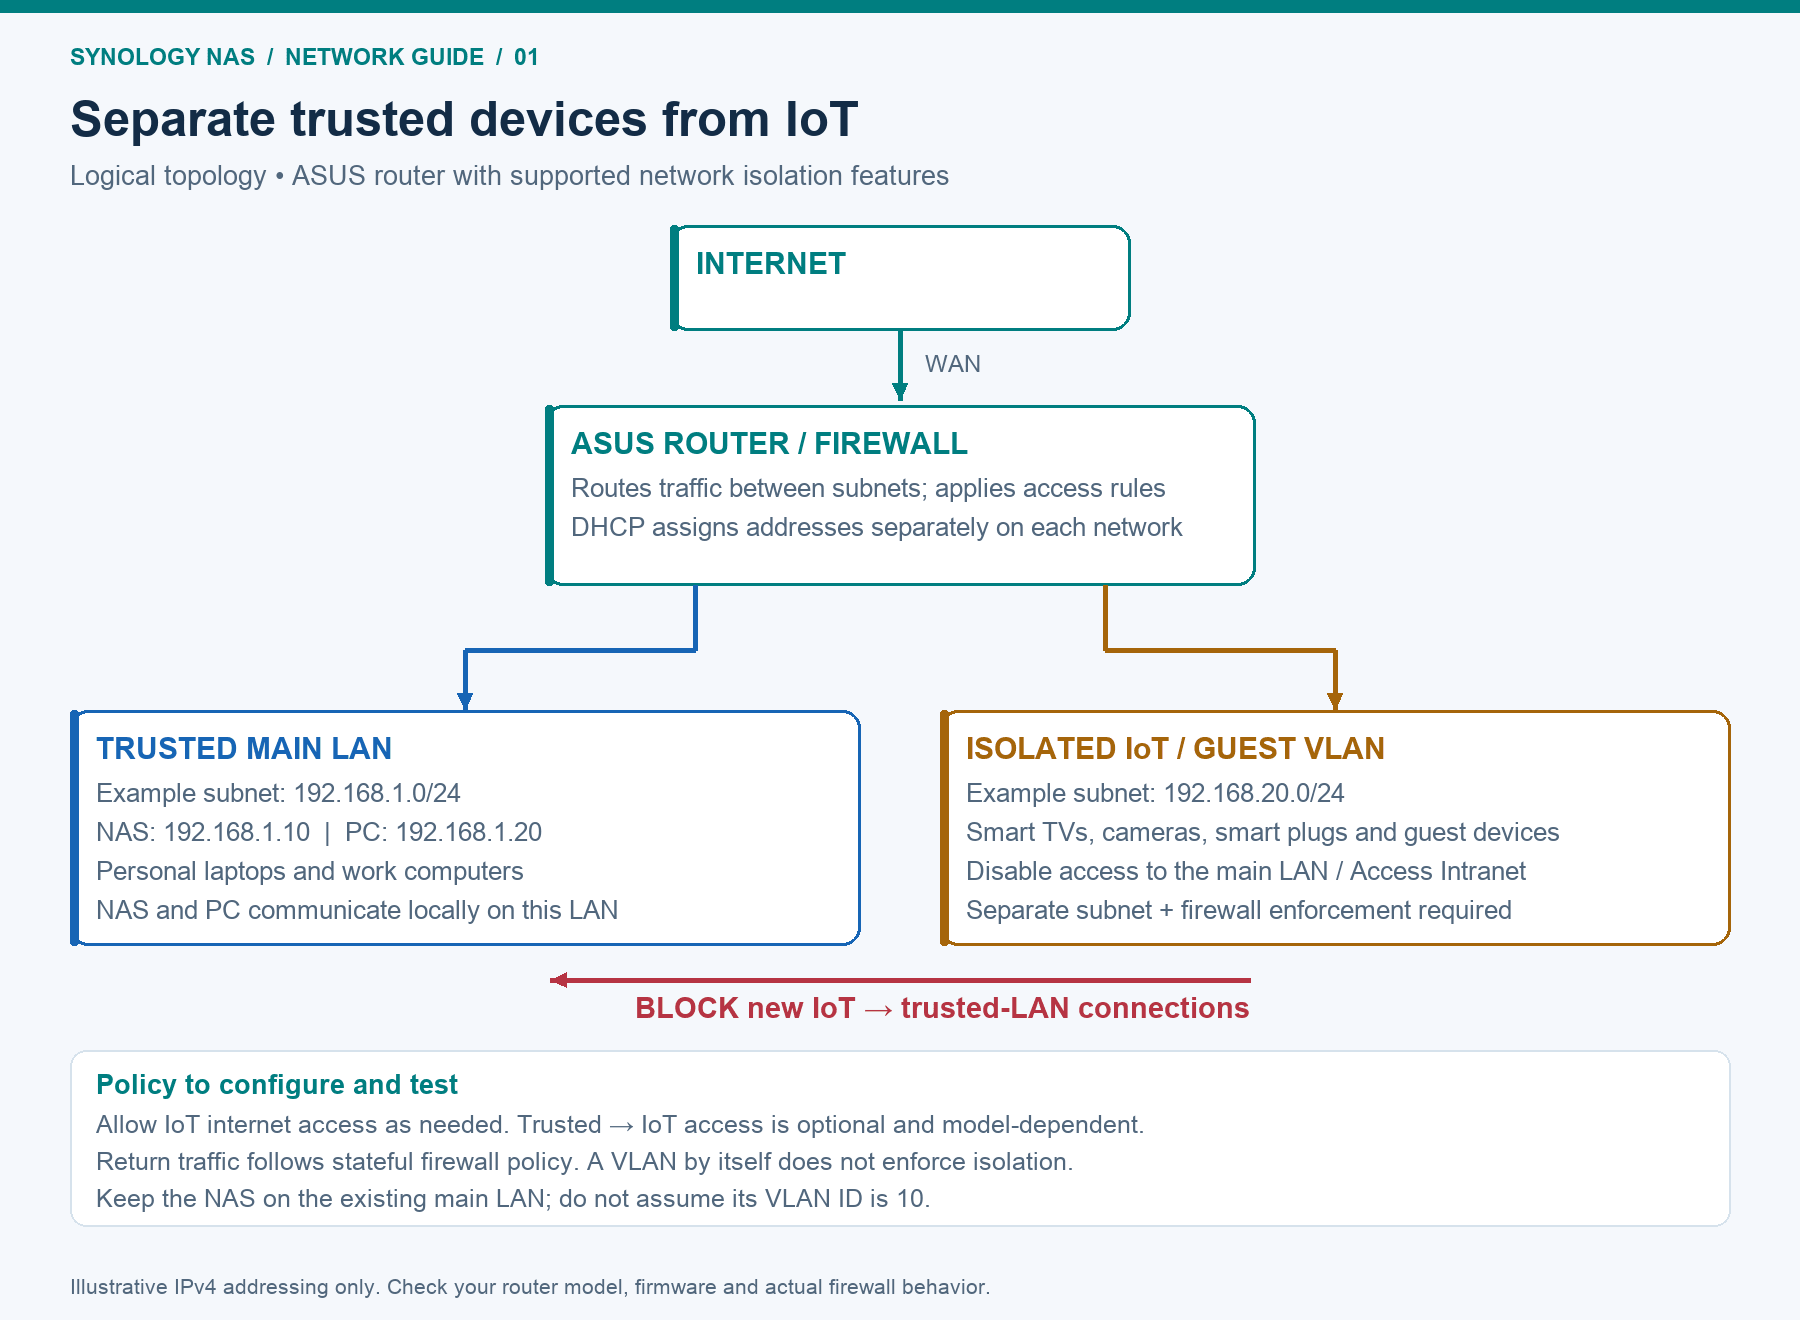
For the best mix of safety and performance, keep your trusted devices (NAS, work computers, personal laptops) on the main LAN, and put untrusted devices (smart TVs, cameras, IoT, guest phones) on a separate VLAN. Then block the untrusted side from starting any connection to the trusted side. Correctly configured firewall rules reduce the risk of a compromised smart device reaching your NAS. VLAN separation alone does not enforce these rules.
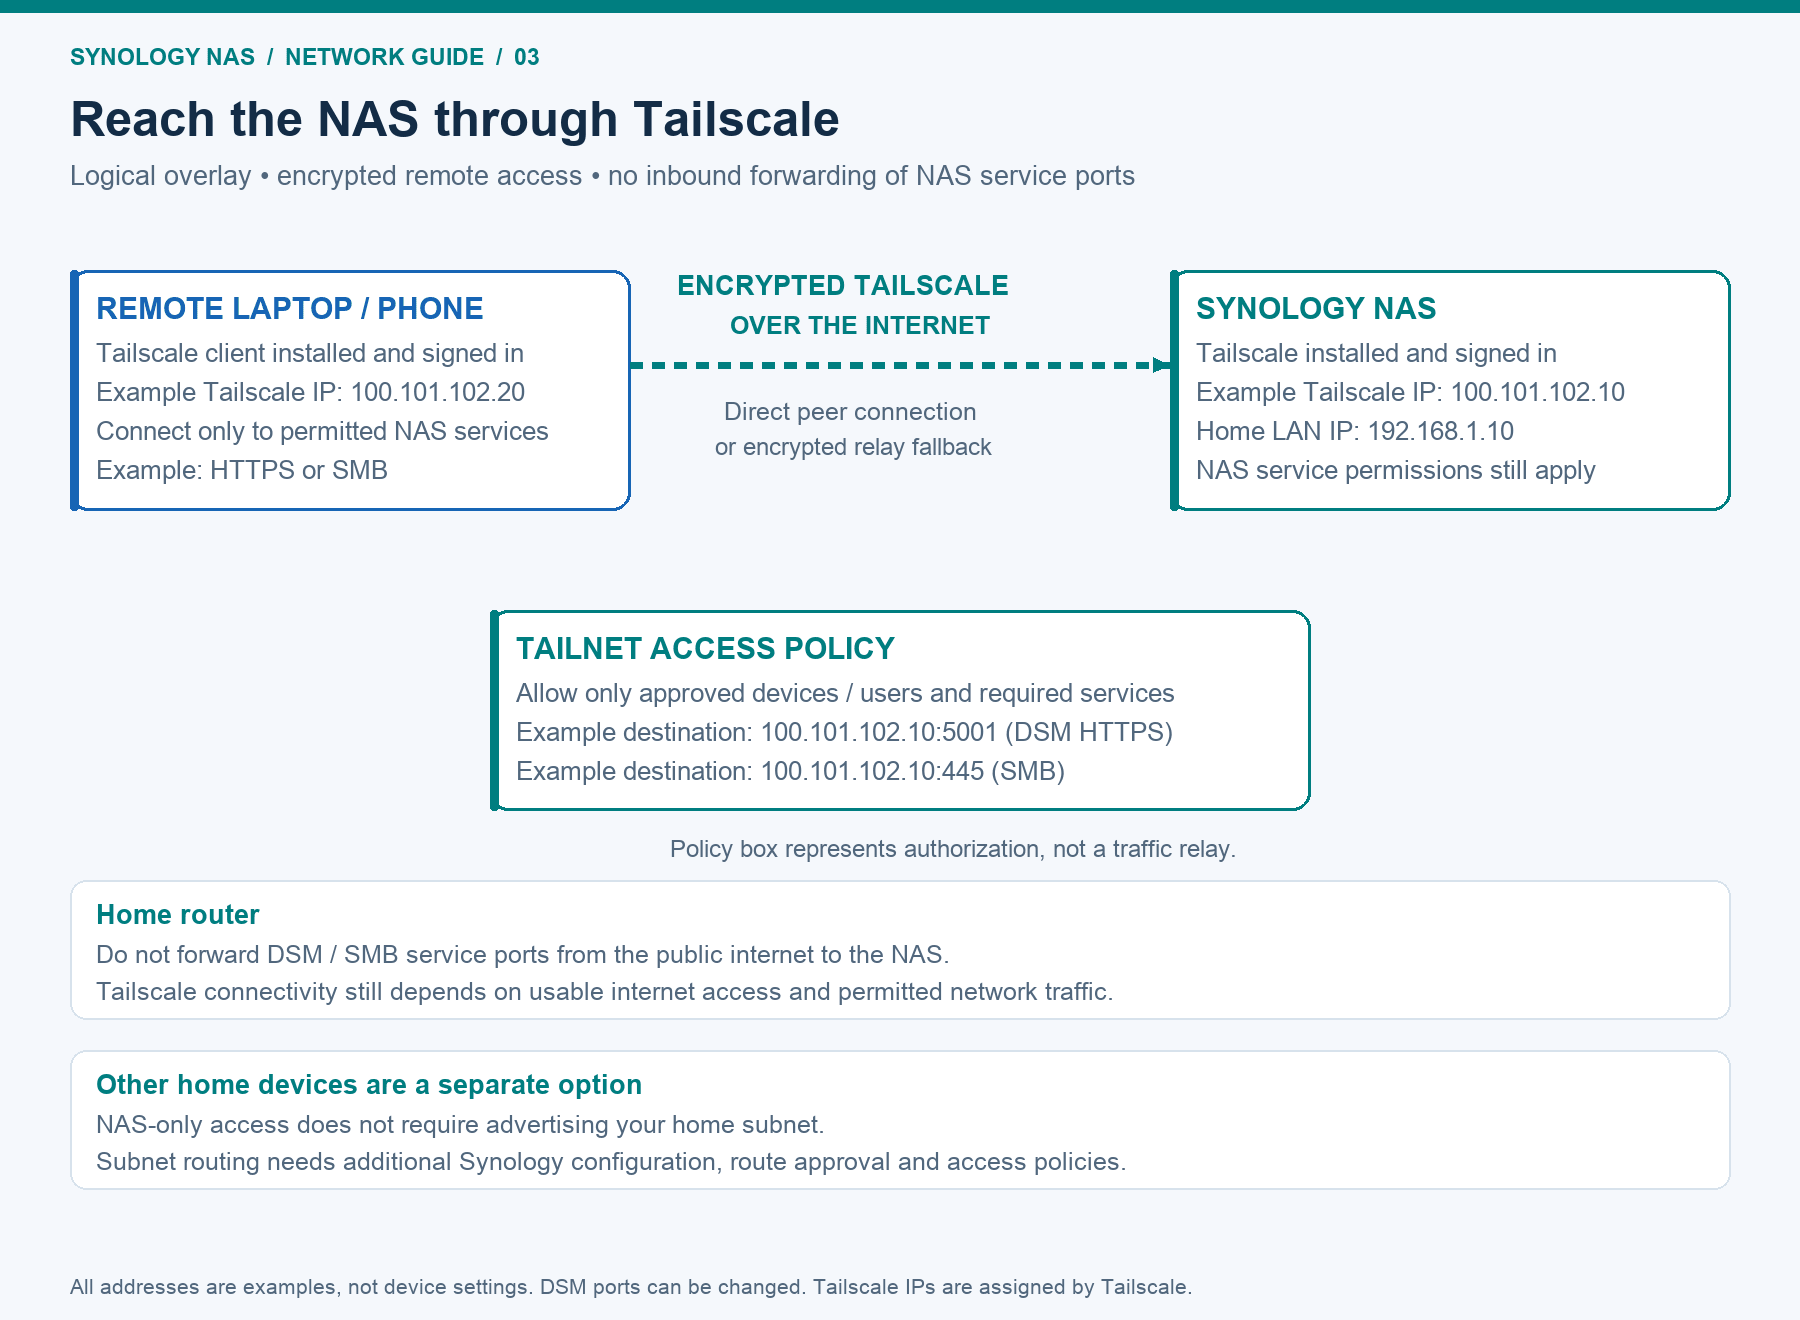
For getting in from outside, do not open NAS ports to the internet. That is one of the most common ways a NAS gets attacked. Instead, install Tailscale on the NAS. It builds an encrypted tunnel between your NAS and your own devices, wherever you are, with no port forwarding.
Here is the layout with an ASUS router doing the work:
Network layout: Internet → ASUS router → two separate networks: the main LAN for the NAS and personal computers, and an IoT VLAN for smart TVs, cameras and guests. Block connections initiated from the IoT VLAN to the main LAN. Any access in the other direction depends on the router’s supported firewall settings.
One good thing about ASUS: on supported models a single router handles this. A managed switch is optional if your router has enough assignable LAN ports; add one when you need more wired VLAN connections.
Part 1: Create the Untrusted VLAN on Your ASUS Router
A quick note first. Not every ASUS router supports VLANs. This feature lives inside Guest Network Pro (renamed to just Network on newer firmware). Support depends on the exact model and firmware. Check the ASUS VLAN compatibility and configuration guide and your model’s documentation before starting. Creating a Guest Network Pro profile also creates a corresponding VLAN.
Steps:
- Log in to the router. Connect by WiFi or cable, open a browser, and go to
http://www.asusrouter.com(or the router's LAN IP). Enter your admin username and password. - Open Guest Network Pro. In the web menu, find Guest Network Pro (or Network on newer firmware). Click the + button to create a new profile.
- Pick the IoT / untrusted profile. Choose the IoT or Guest type. Give it its own WiFi name and password. This profile gets its own subnet and its own VLAN automatically. Devices here will not be on the same network as your NAS.
- Block access to your main network. This is the important step. Go to the profile's Network > General > Access Intranet setting. Uncheck the main network. Unchecking it stops devices on this VLAN from reaching your main LAN where the NAS lives. Checking it would allow access, which is what you do not want for IoT. Click Apply.
- (Optional) Add wired ports to the VLAN. If you have wired IoT gear, go to LAN > VLAN. In the Profile tab you can see the VLAN that was created, and in the VLAN tab you can set a specific LAN port to Access mode and assign it to that profile. That port now belongs to the untrusted VLAN.
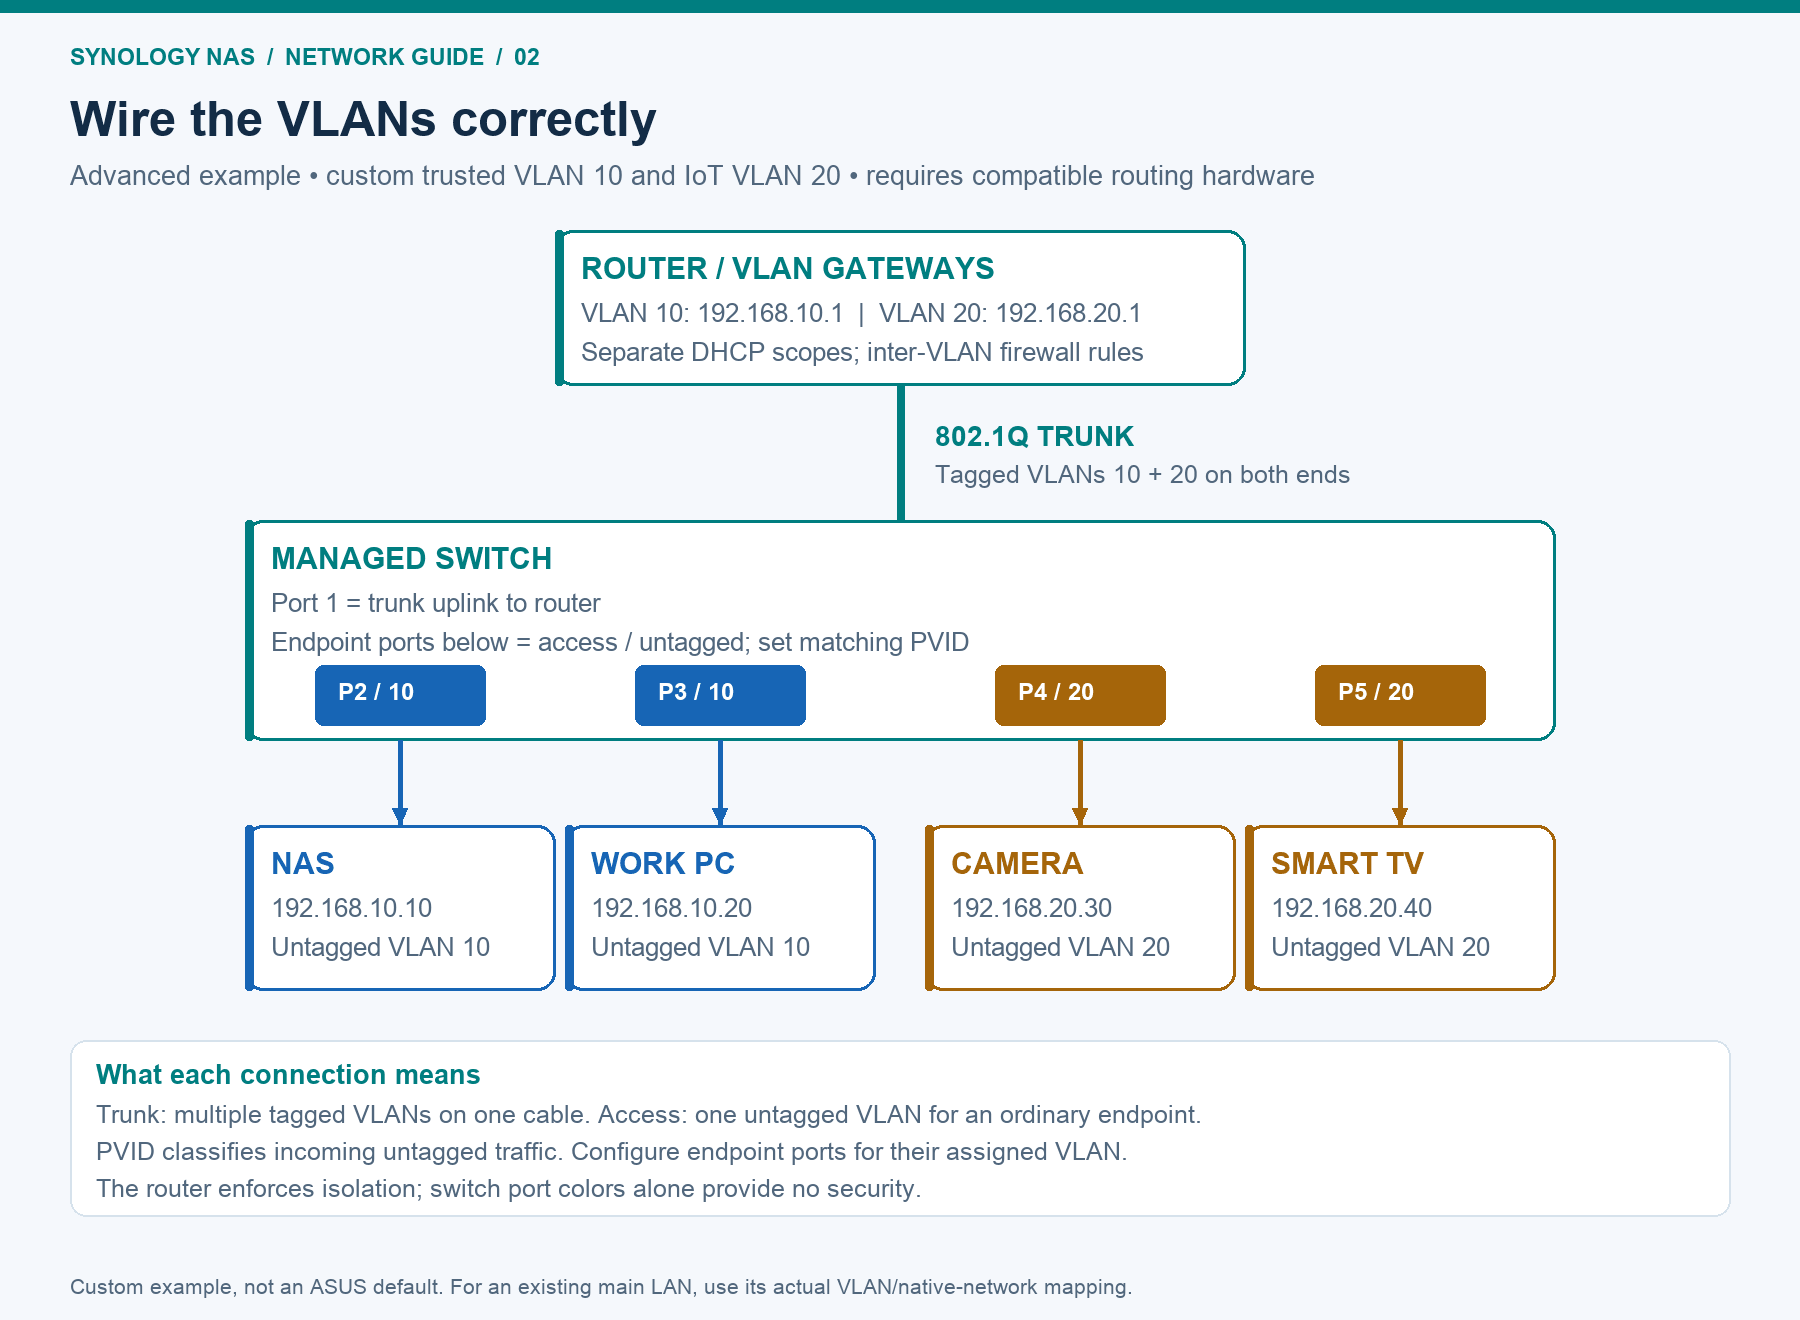
Your NAS and computers stay on the normal main network. Keep untrusted gear on the new VLAN and verify that its firewall policy blocks new connections to the main LAN.
If you want wired VLAN devices spread across the house, connect the router to a managed switch that supports VLAN tagging (IEEE 802.1Q) using a trunk uplink configured for the required VLANs, then assign endpoint access ports to the appropriate VLAN. For WiFi-only IoT, the router alone is enough.
Part 2: Install Tailscale on the Synology NAS
Tailscale’s current official Synology guide says the version listed in Synology Package Center is no longer supported. Download and manually install the current official DSM package instead.
Steps:
- Download and manually install the official package. Follow the Tailscale Synology guide to identify your NAS architecture and DSM version. Download the matching stable SPK from the official package server. In DSM, open Package Center → Manual Install, select that SPK and follow the prompts.
- Log in to your tailnet. After it installs, open the Tailscale app and log in with your identity provider (Google, Microsoft, etc.). If you do not have a Tailscale account, a free one is created for you. Your NAS gets a Tailscale IP address (it looks like
100.x.x.x). - Install Tailscale on your other devices. Put the Tailscale app on your laptop and phone and sign in with the same account. Confirm that your tailnet access policy allows the devices and NAS services you need. You can then use the NAS’s Tailscale IP remotely without forwarding NAS service ports on your router.
- (DSM 7 only) Turn on outbound access if you need it. On DSM 7, Synology limits what the package can do. By default you can connect into the NAS over Tailscale, but the NAS cannot make outbound Tailscale connections to other apps. The official Synology guide covers the DSM 7 configuration needed for outbound connections. Skip this if you only want to reach the NAS from outside.
- (Optional) Make the NAS a subnet router. If you want to reach other home LAN devices through the NAS, follow the complete Synology subnet-router instructions, including DSM configuration, route approval and access policies. Advertising a route alone is not a complete setup. Skip this if you only need NAS access.
Quick Checklist
Before relying on the setup, test from an IoT device that NAS services are unreachable. Then test approved remote access from a phone on cellular data with Tailscale enabled. Verify access again after changing router or firewall settings.
- Untrusted devices on their own VLAN, with Access Intranet unchecked.
- NAS and computers on the main network.
- No NAS ports forwarded on the router.
- Tailscale on the NAS and on your devices.
This setup reduces access from untrusted devices and provides encrypted remote access to your NAS. Keep DSM, router firmware and packages updated; use strong account security, restrict NAS permissions and maintain independent backups. Installing a mesh VPN alone does not create a complete least-privilege security design.
Note: exact menu names differ a little by ASUS model and firmware, and by DSM version, so your screen may not match word for word.